

I’ll never forget that corporate gala in a wood-paneled library where the mahogany bar was meant to be the star of the room. In person, it was a masterpiece of deep reds and chocolates. Through my lens? It looked like a literal black hole. I spent twenty minutes sweating, trying to find a way to make the grain show up without making the bartender look like he was under interrogation. It was a humbling moment that taught me everything I didn’t know about surface textures and light absorption. At that point, I realized that high-end materials don’t just look expensive—they behave differently under light. Today, I’m going to save you that stress by walking you through the subtle art of lighting dark wood so your evening photos actually reflect the luxury of the setting.
The Night My Mahogany Masterpiece Looked Like a Featureless Void
I made a classic rookie mistake early on: I pointed my speedlight directly at the bar. It was a disaster. The result was a harsh, white glare on the finish that looked more like a forensic crime scene than a high-end celebration. If you’ve ever wondered about the hidden cost of using cheap floor lighting for your reception, it’s exactly this—it ruins the very atmosphere you spent thousands to create. Research from the Illuminating Engineering Society (IES) confirms that dark wood finishes can have a Light Reflectance Value (LRV) as low as 10%, which means the material essentially drinks your light rather than bouncing it back to your sensor. You can’t just throw more light at it; you have to be strategic. It’s the same principle as when you’re trying to figure out the best way to light a buffet line for evening events: if you don’t respect the shadows, the food—or in this case, the wood—looks flat and unappealing. Have you ever felt like your camera was fighting against the room’s decor rather than capturing it?
Is it actually possible to light dark wood without that annoying glare?
Many photographers and event planners fear that adding more light will inevitably kill the ‘moody’ vibe of a dark bar. I used to think the same. But the secret isn’t more light—it’s better placement. When you how to choose the right lighting for a high-stakes board dinner, you realize that cross-lighting is your best friend. By placing your light sources at 45-degree angles to the wood, you highlight the texture of the grain without creating that blinding ‘hot spot’ in the center of your frame. It’s also vital that you test your event lighting during the day and night because what looks like a rich brown at 4 PM can turn into a muddy charcoal by 8 PM. We are aiming for that ‘glow from within’ look, and I promise, once you see the difference, you’ll never go back to direct flash again. This isn’t just about gear; it’s about understanding how to make a space feel as warm and inviting in a photo as it does when you’re standing there with a cocktail in hand.
Stop Aiming Directly at Your Subject
Think of your flash like a fire hose. If you point it straight at a mahogany bar, you aren’t lighting it; you are blasting it. To capture that deep, liquid-like finish of high-end wood, you need to use the ‘feathering’ technique. This involves aiming your light slightly away from the bar so only the soft, outer edge of the light beam touches the wood. It is the same logic as expert server techniques where the goal is a subtle presence rather than an overwhelming force. When I was shooting a private library event last winter, I actually turned my flash head 180 degrees and bounced it off a white poster board held by a distracted intern. The difference was night and day—instead of a white hot-spot, the grain of the wood suddenly appeared as if illuminated from within. 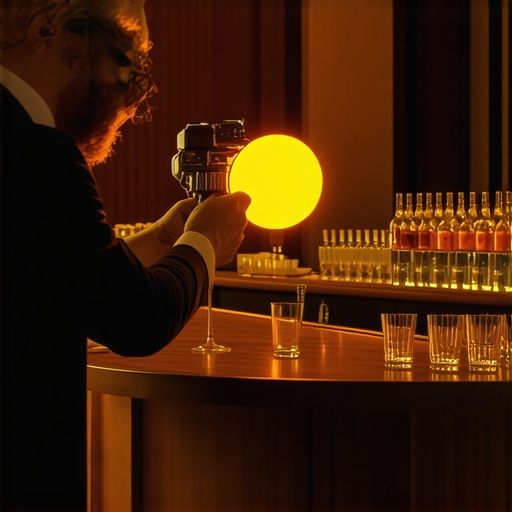
Use Your Walls to Your Advantage
If the room has light-colored walls or ceilings, they are your best friends. By bouncing your light off a neutral surface, you transform a tiny, harsh light source into a massive, soft one. This is crucial when you are trying to avoid the hidden risks of hiring student servers or photographers who might not understand the physics of reflection. If you are in a room with dark walls, look for a white tablecloth or even a large menu board to act as a reflector.
The 45-Degree Trick for Texture
Shadows define texture. To make that dark wood look three-dimensional, your light needs to come from the side. Imagine a clock face: if your camera is at 6 o’clock, your light should be at 4 or 8. This creates small shadows within the wood grain, which the human eye perceives as ‘richness.’ It’s the same reason why your corporate gala needs a dedicated social media backdrop—the lighting is specifically angled to make subjects pop rather than look flat against a wall.
Why Soft Light is the Only Light for Mahogany
Hard light creates highlights that are too bright for the camera to handle, resulting in ‘clipped’ whites where no detail exists. You want to wrap the light around the bar. I remember a wedding where the couple had chosen a dark oak theme for their reception. The venue was beautiful, but the lighting was abysmal. I spent the first hour teaching the waitstaff how to avoid walking through my bounce zones. It felt a bit like optimizing server efficiency in real-time. By softening the output through a double-layer diffuser, the wood went from looking like cheap plastic to the expensive heirloom it actually was.
Match Your Color Temperature to the Cocktail Menu
Dark wood is naturally warm. If you hit it with ‘cool’ or blue-toned light, it will look sickly and gray. Adjust your flash to match the ambient warmth of the room. This ensures that the signature drink being served looks as appetizing as possible. If the bar is glowing with amber Edison bulbs, use a CTO (Color Temperature Orange) gel on your flash. This tiny piece of plastic is the difference between a photo that feels like a cozy lounge and one that feels like a hospital hallway.
Mind the Placement of the Bar
Often, the layout of the room is your biggest enemy. If you find the bar is placed as far from the entrance as possible, it might be in a corner with zero natural light. In these cases, you must create your own ‘key’ and ‘fill’ light. Don’t be afraid to set up a remote-triggered light on a stand behind the bartender. This ‘rim light’ will separate the dark wood from the dark background, preventing the entire setup from disappearing into the shadows.It’s a common trap to assume that if you’ve nailed the lighting on that mahogany bar, the atmosphere is set in stone. In my experience, even the most beautifully lit room can feel ‘off’ if the human element is out of sync. Many clients believe that throwing more bodies at a room increases the luxury feel, but I’ve found the opposite to be true. Over-staffing often leads to ‘service clutter,’ where the guests feel claustrophobic rather than cared for. This is especially true when you don’t have a clear chain of command on site. A study by the International Journal of Hospitality Management indicates that guest satisfaction peaks when service is attentive yet unobtrusive—a balance that is impossible to strike if your team is tripping over each other in the shadows.
Do your servers actually know what is on the plate?
This is the advanced question every planner should ask during the tasting. I once worked a gala where the floor lighting was museum-grade, but the servers couldn’t tell the difference between the vegan risotto and the standard one. It was a disaster. You have to spot a server who hasn’t been briefed early in the night to prevent a PR nightmare. This is a classic ‘oops’ factor: assuming the catering team’s internal communication is as polished as their uniforms. #IMAGE_PLACE_HOLDER_C# To avoid this, I always recommend a pre-shift huddle to brief your server team on dietary restrictions effectively. When the lighting and the logistics move in harmony, that’s when the magic happens. Have you ever fallen into the trap of focusing so much on the ‘look’ of an event that you missed a service red flag? Let me know in the comments below.Maintaining that ‘perfect’ look across a dozen corporate galas or a busy wedding season isn’t about luck; it is about the systems you put in place when the cameras are off. I’ve learned the hard way that the most expensive gear in the world won’t save you if your workflow is a mess. For me, the game-changer was switching to the Sony A7R series. Beyond the resolution, it was the silent shutter technology that saved my skin during intimate moments. You really need to understand why your photographer should use a silent shutter during speeches—nothing kills the mood of a heartfelt toast faster than the mechanical ‘clack-clack’ of a DSLR. I also swear by the Godox AD200 Pro for lighting mahogany; it is small enough to hide behind a floral arrangement but powerful enough to fill a dark corner.
How can I keep my event quality consistent every single time?
The secret to long-term results is building a repeatable ‘lighting map’ for different venue types. I keep a digital notebook with settings for every wood-heavy library or glass-filled ballroom I’ve worked in. This level of preparation is the backbone of effective catering strategies for corporate event impressiveness. If you aren’t documenting what works, you are reinventing the wheel every Saturday. I also rely heavily on logistics software like Caterease to ensure that the ultimate guide to corporate event catering logistics isn’t just a document, but a living, breathing schedule that every server can access. According to the Sony Alpha technical specifications for the BSI CMOS sensor, the dynamic range allows for five stops of recovery in shadows—this is my safety net for when a mahogany bar is even darker than anticipated. 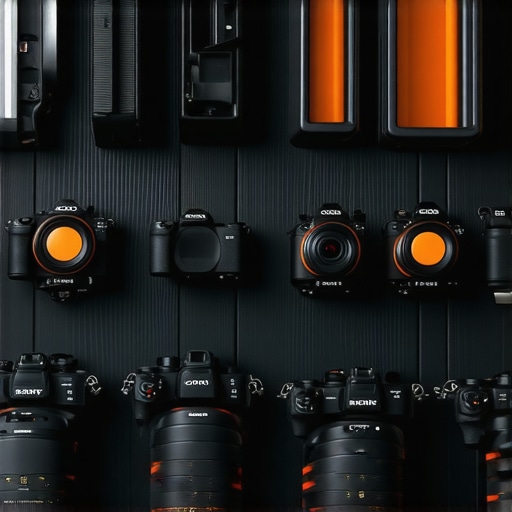
Pack These Essentials to Survive Corporate Galas
Your gear bag needs to be as organized as your server team. I never leave for a high-stakes event without a set of CTO gels and a handful of black cinefoil to flag my lights. This allows me to control the spill and keep the focus on the wood grain without blinding the guests. It’s similar to how you would brief your server team on complex dietary restrictions in minutes—precision and speed are your best friends. I also recommend a high-quality tablet for the head of service to track guest flow. When the technology and the top server tips to elevate your event experience merge, the guest never sees the ‘effort’ behind the luxury; they only see the result. Looking ahead, I predict we will see more AI-integrated lighting systems that automatically adjust color temperature as the sun sets, but for now, your manual oversight is what makes the difference. I challenge you to pick one ‘dark’ spot at your next event and use a 45-degree bounce rather than direct light—you’ll see the texture come alive instantly.
What the Camera Sensor Taught Me About Luxury
Lighting high-end materials like mahogany isn’t just a technical challenge; it’s a lesson in humility. Here are a few things I’ve learned the hard way through years of trial and error:
- The Absorption Trap: Dark wood has a light reflectance value that can sink as low as 10%. You aren’t just lighting a surface; you are fighting a material that actively ‘drinks’ your light, making it look flat in digital files.
- Texture Over Brightness: Your goal should never be to make the wood ‘bright.’ Instead, focus on creating tiny highlights on the grain to give it depth. This creates that three-dimensional feel that guests love.
- Server Coordination: Even the most perfect light placement fails if a server is standing in the way of your bounce. I’ve found that top server tips to elevate your event experience often include awareness of the photographer’s ‘lighting zones’ to keep the visual lines clean.
- The Amber Handshake: Always match your flash to the venue’s warmth. If you hit a warm, candlelit bar with cool blue light, you destroy the soul of the room and make the wood look like gray plastic.
The Gear That Rescued My Reputation
You don’t need a truckload of equipment, but you do need the right tools to handle these high-contrast environments. These are the four items I never leave home without when I know I’m walking into a wood-heavy library or gala hall:
- Sony A7R Series: The dynamic range on these sensors is a lifesaver. It allows me to pull detail out of the deepest mahogany shadows that other cameras would just turn into black digital noise.
- Godox AD200 Pro: This is the Swiss Army knife of lighting. It’s small enough to hide behind a floral arrangement but has the punch to light a dark corner without being intrusive.
- Rosco CTO Gels: Essential for color balancing. These little orange sheets ensure that effective catering strategies for corporate event impressiveness aren’t undermined by sickly, mismatched lighting.
- Cinefoil: I use this black aluminum foil to flag my lights. It prevents the beam from spilling onto the guests’ faces while I focus the glow strictly on the bar’s craftsmanship.
#IMAGE_PLACEHOLDER_E#
Capture the Glow Everyone Else Misses
Capturing the rich, liquid-like finish of a dark wood bar is about more than just technical settings; it’s about respecting the atmosphere of the venue. By mastering these subtle lighting techniques, you transition from a person taking photos to a storyteller preserving the luxury of the moment. Following wedding catering tips from industry experts can often give you the lead time you need to set up these complex shots before the crowd arrives. Don’t be afraid to experiment with extreme angles and unusual bounce surfaces—every high-end room has a secret glow waiting to be found.
Have you ever struggled with a venue that felt like a ‘black hole’ for your lighting? Let me know your favorite workaround in the comments below.